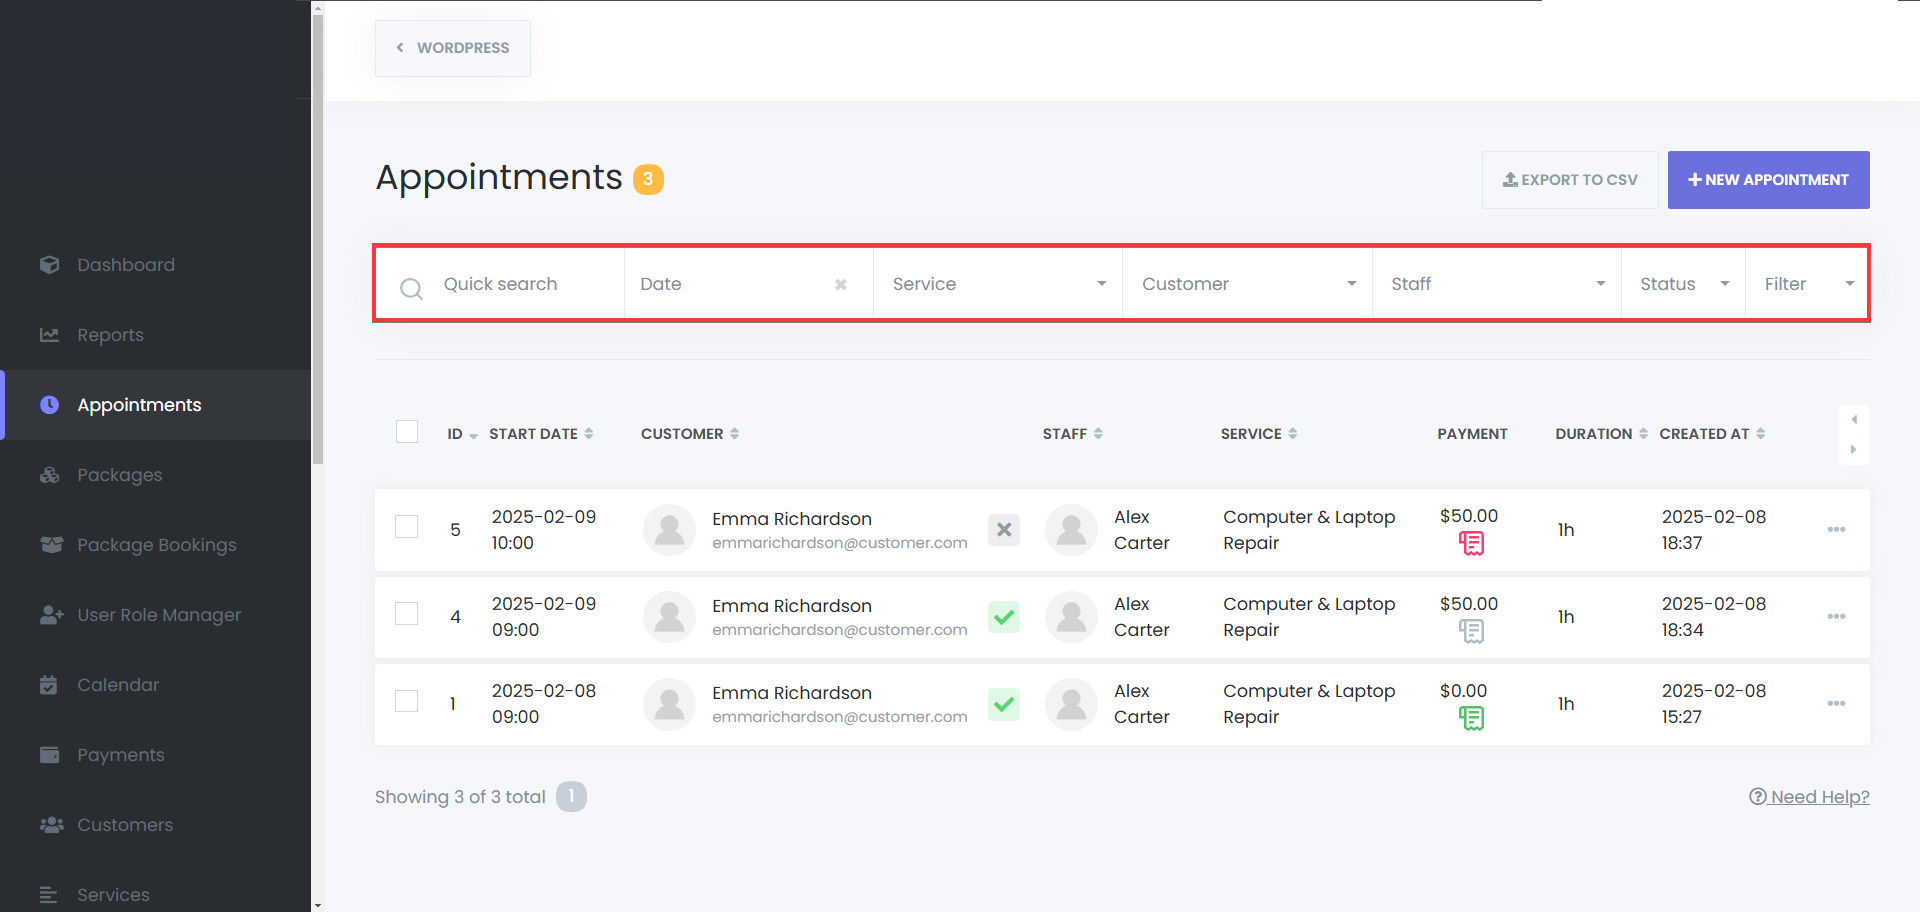
Accessing the Appointments Menu #
Select the Appointments tab to open the appointments interface.

Managing Appointments #
Editing an Appointment #
Locate the Appointment – Use the search or filter functions.
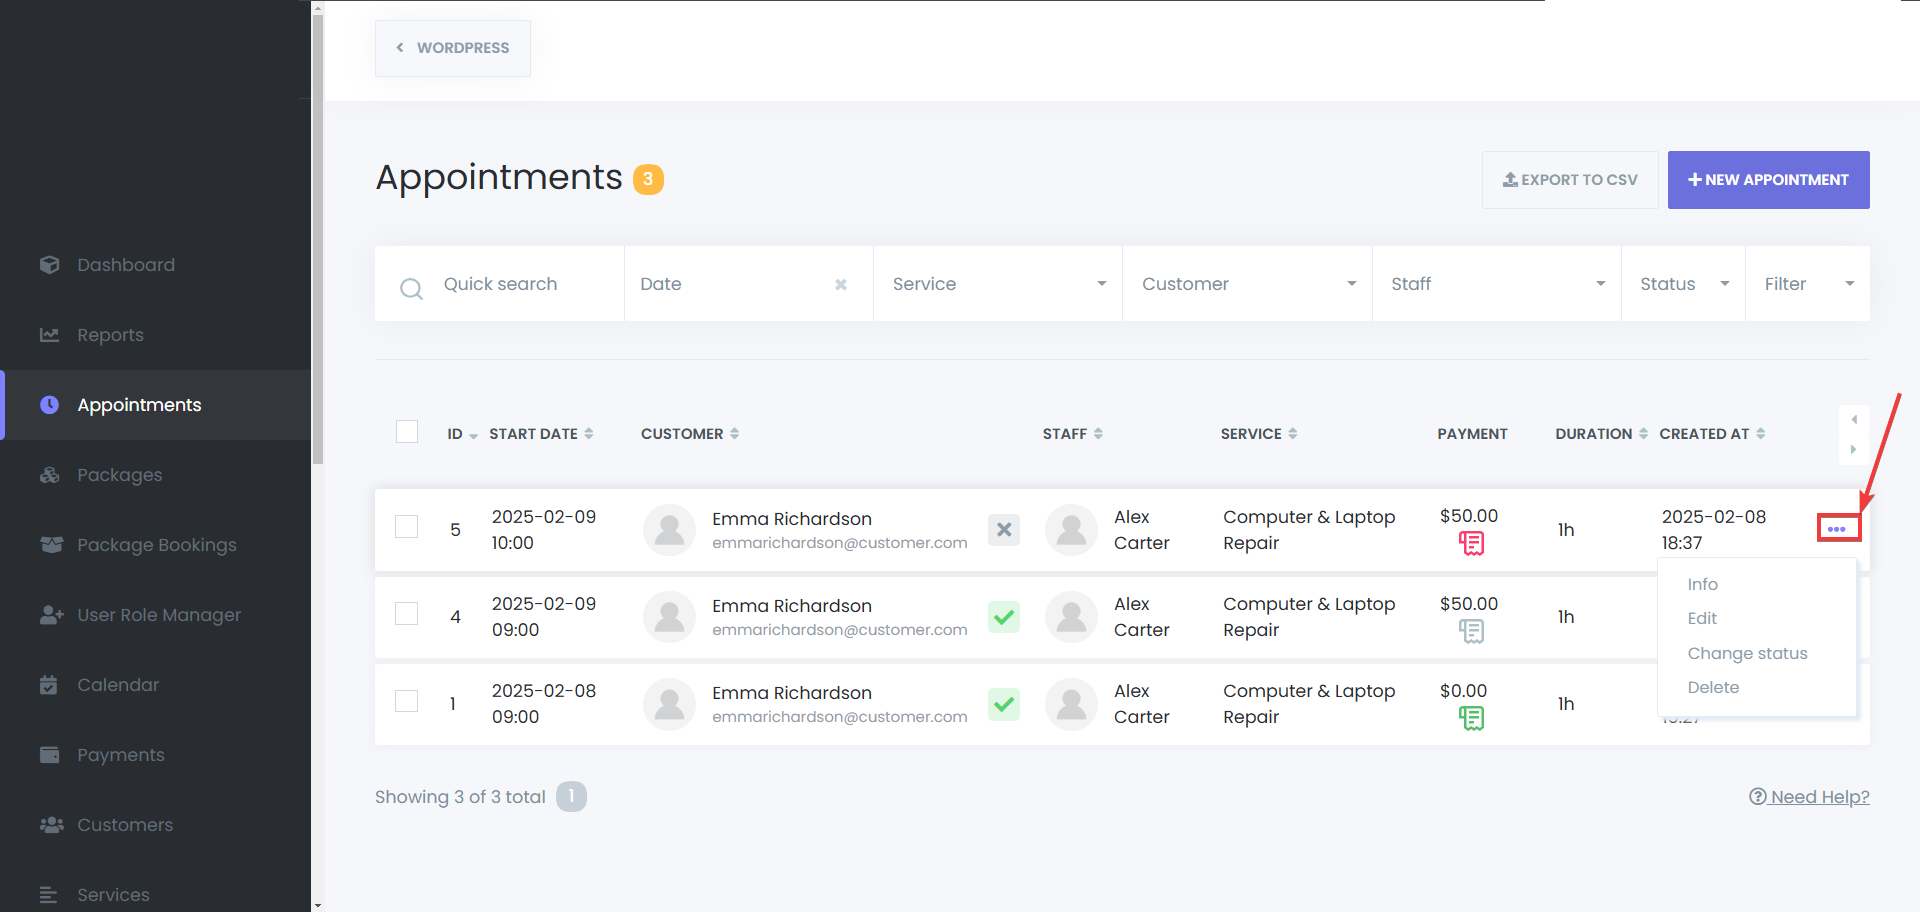
Click on the Options Icon – Open the menu next to the appointment.
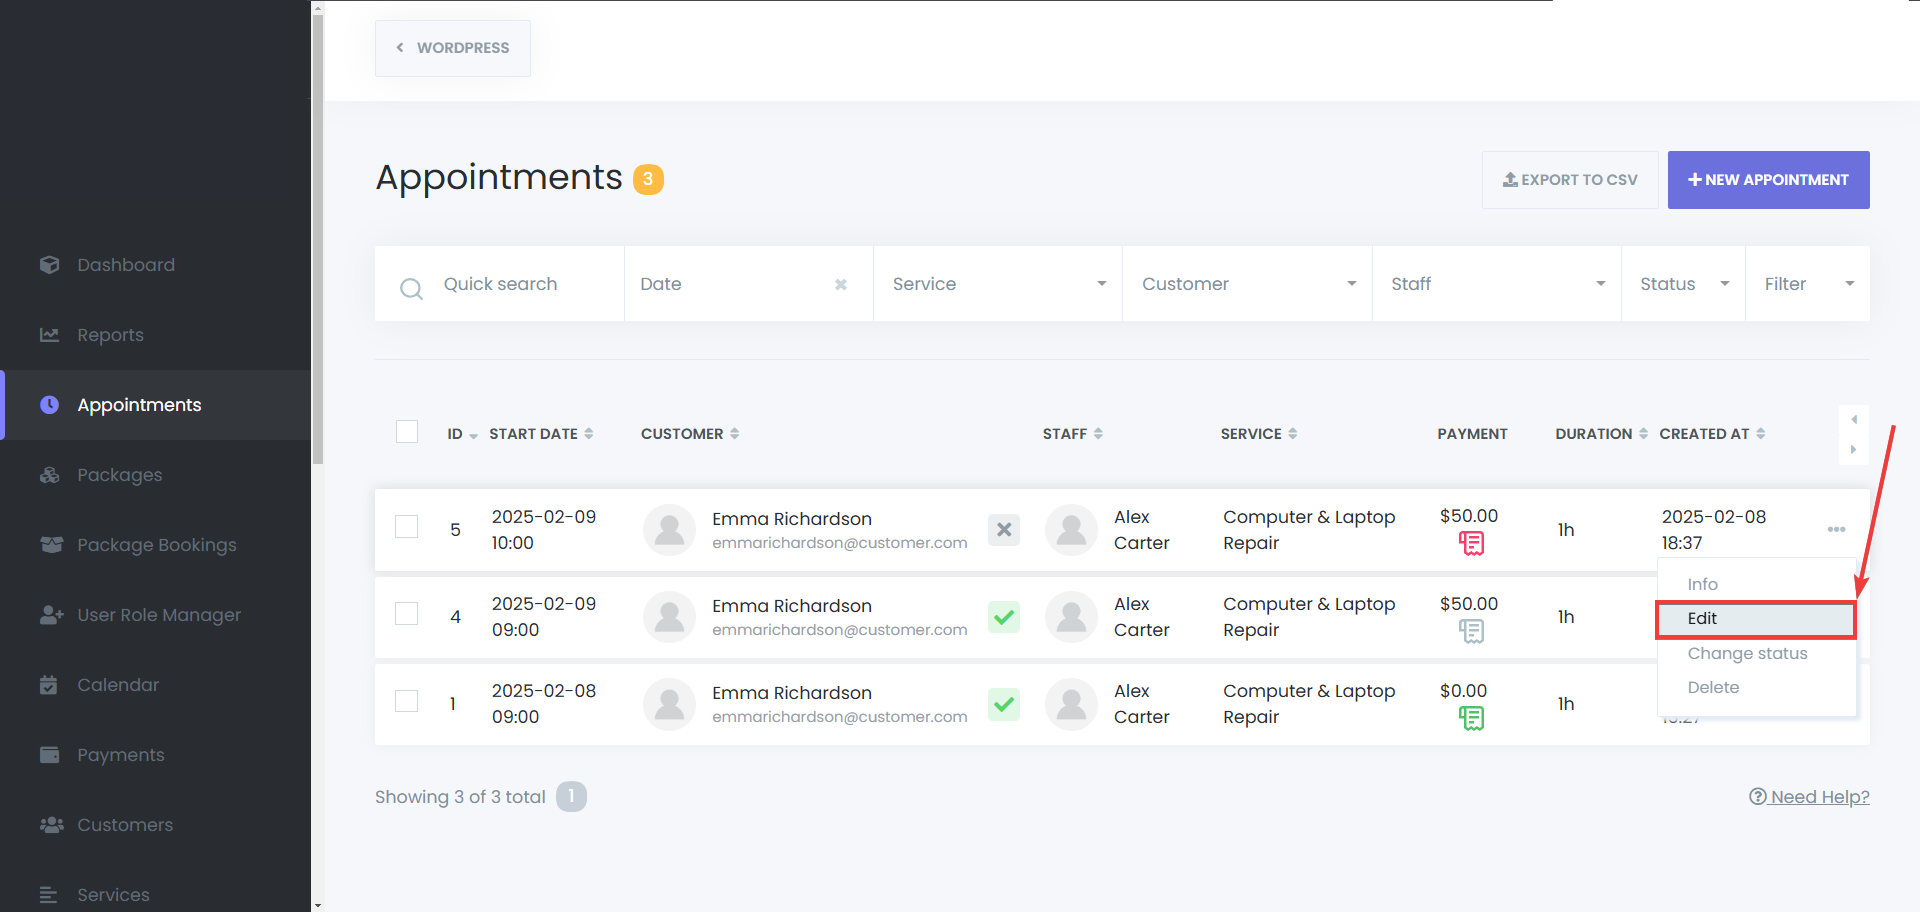
Select “Edit” – Modify details such as service, staff, or time.
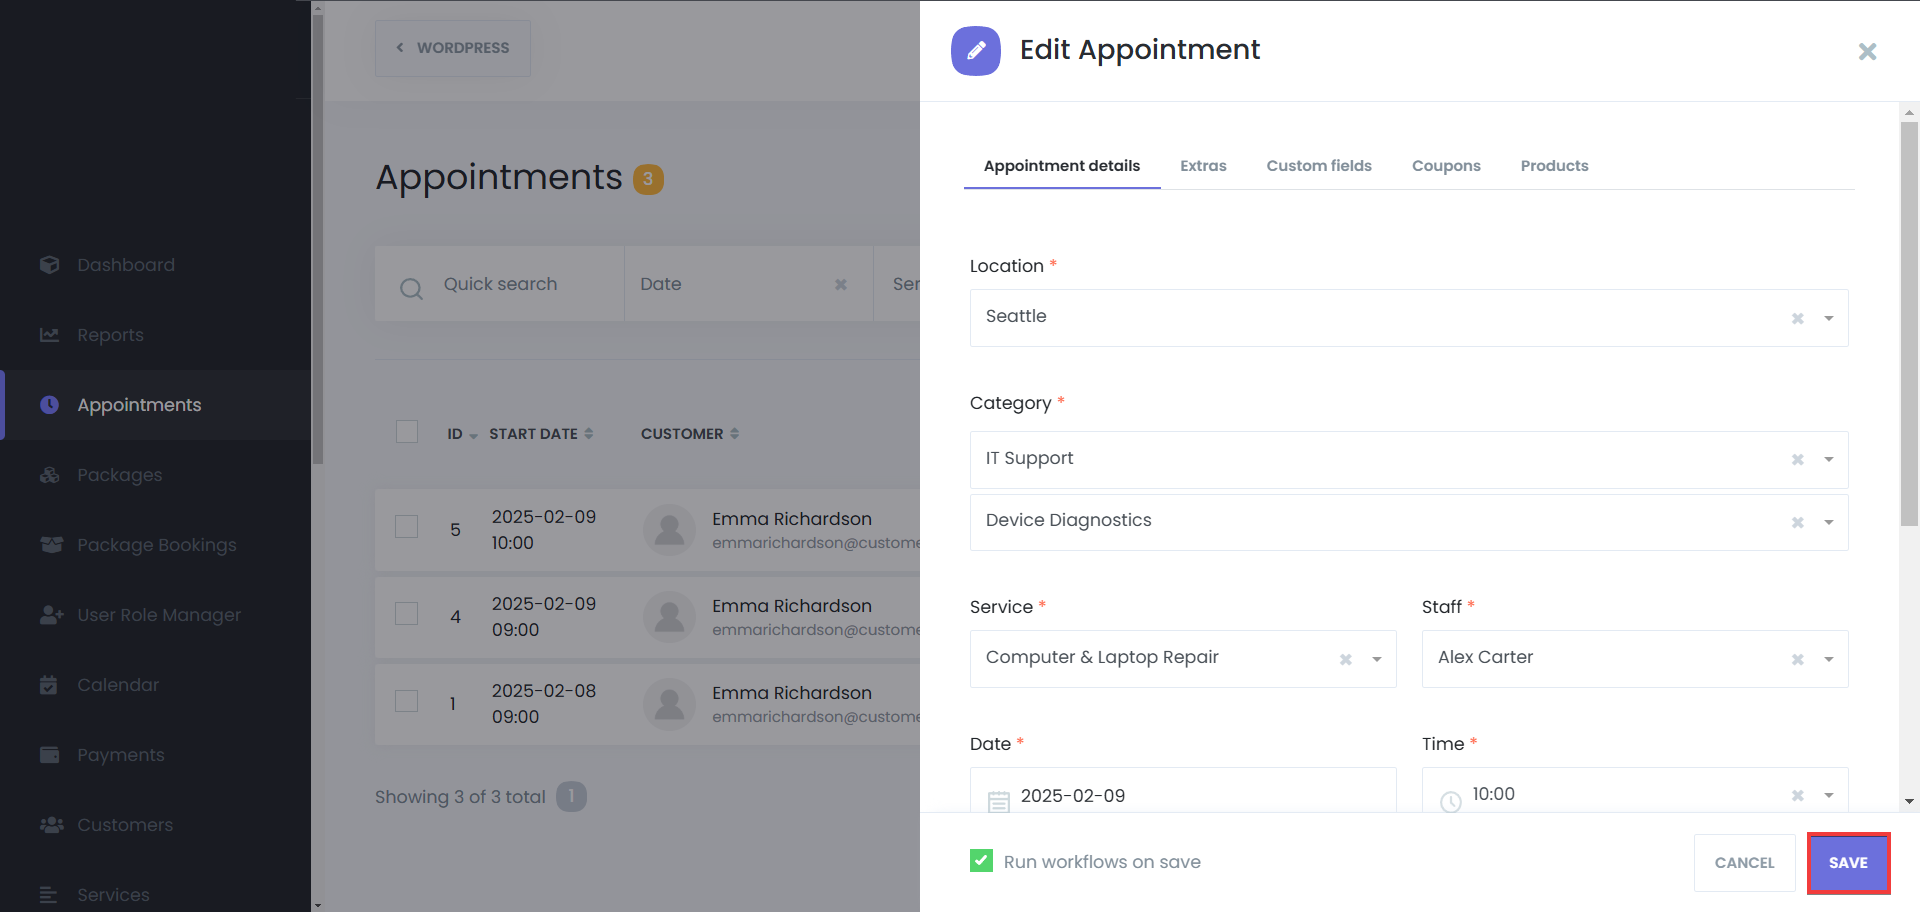
Save Changes – After you’ve made your changed, click Save to update the booking.
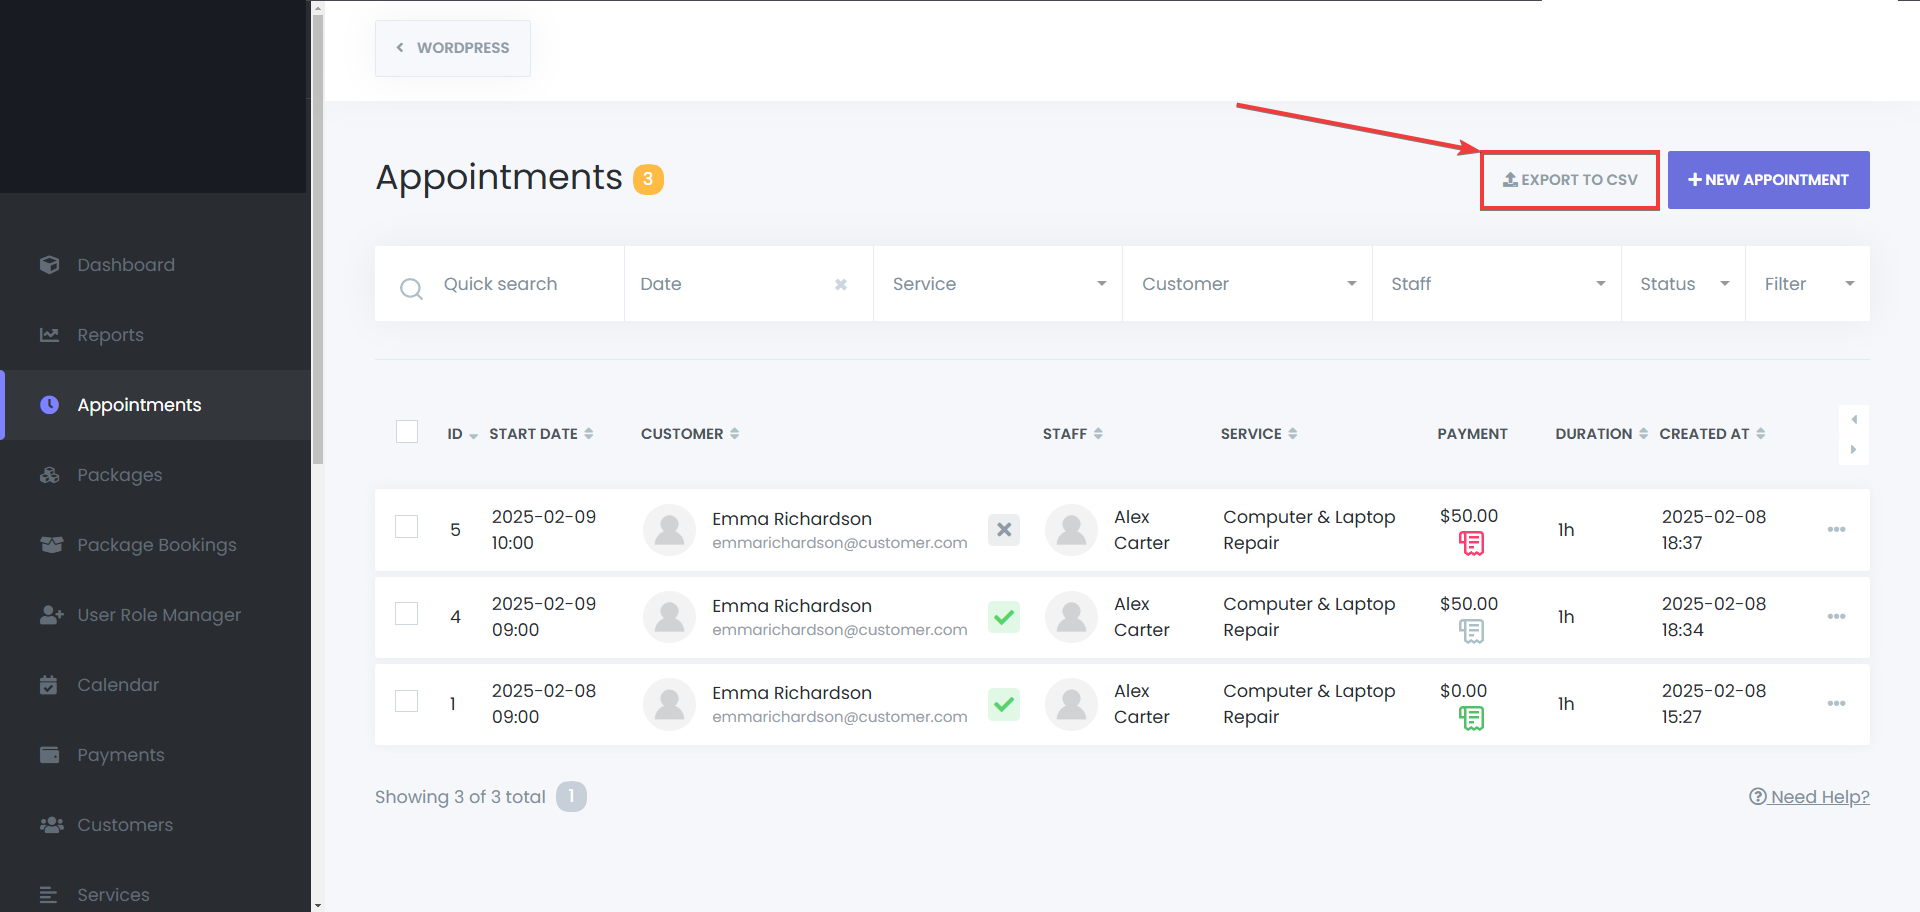
Export Appointments as CSV #
Export to CSV – Export your current appointments to a CSV file easily.
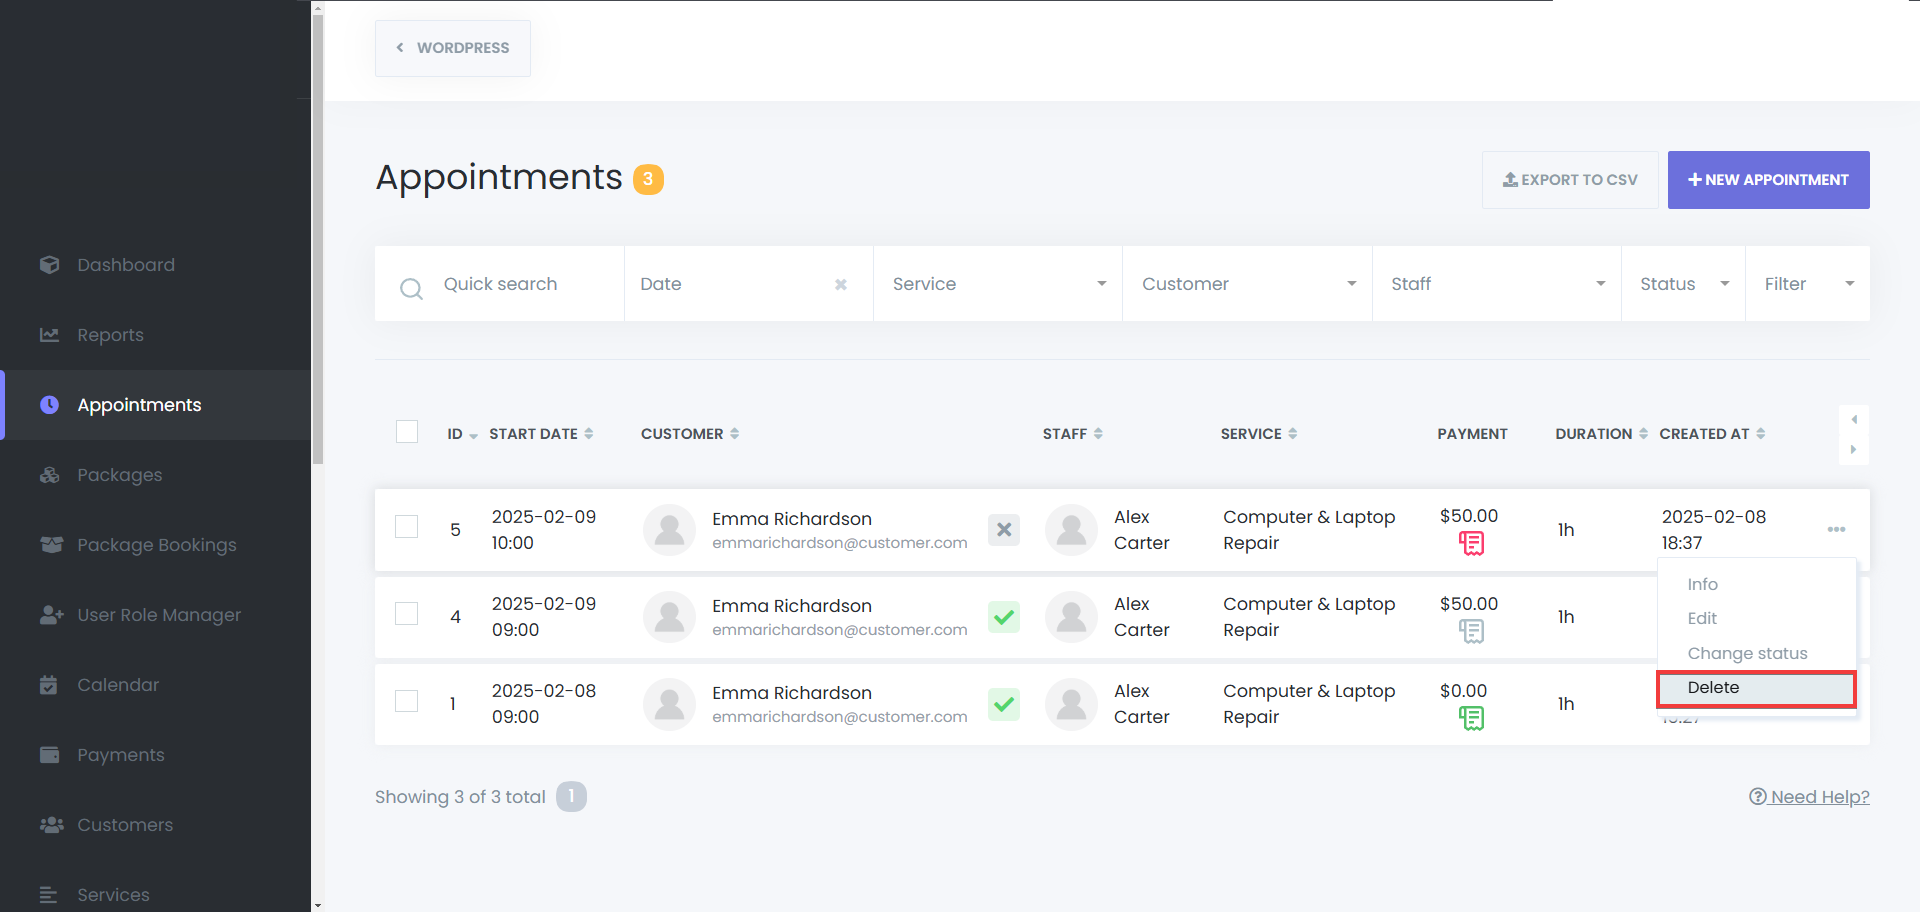
Deleting Appointments #
- Single Deletion – Open the menu for an appointment and select Delete.
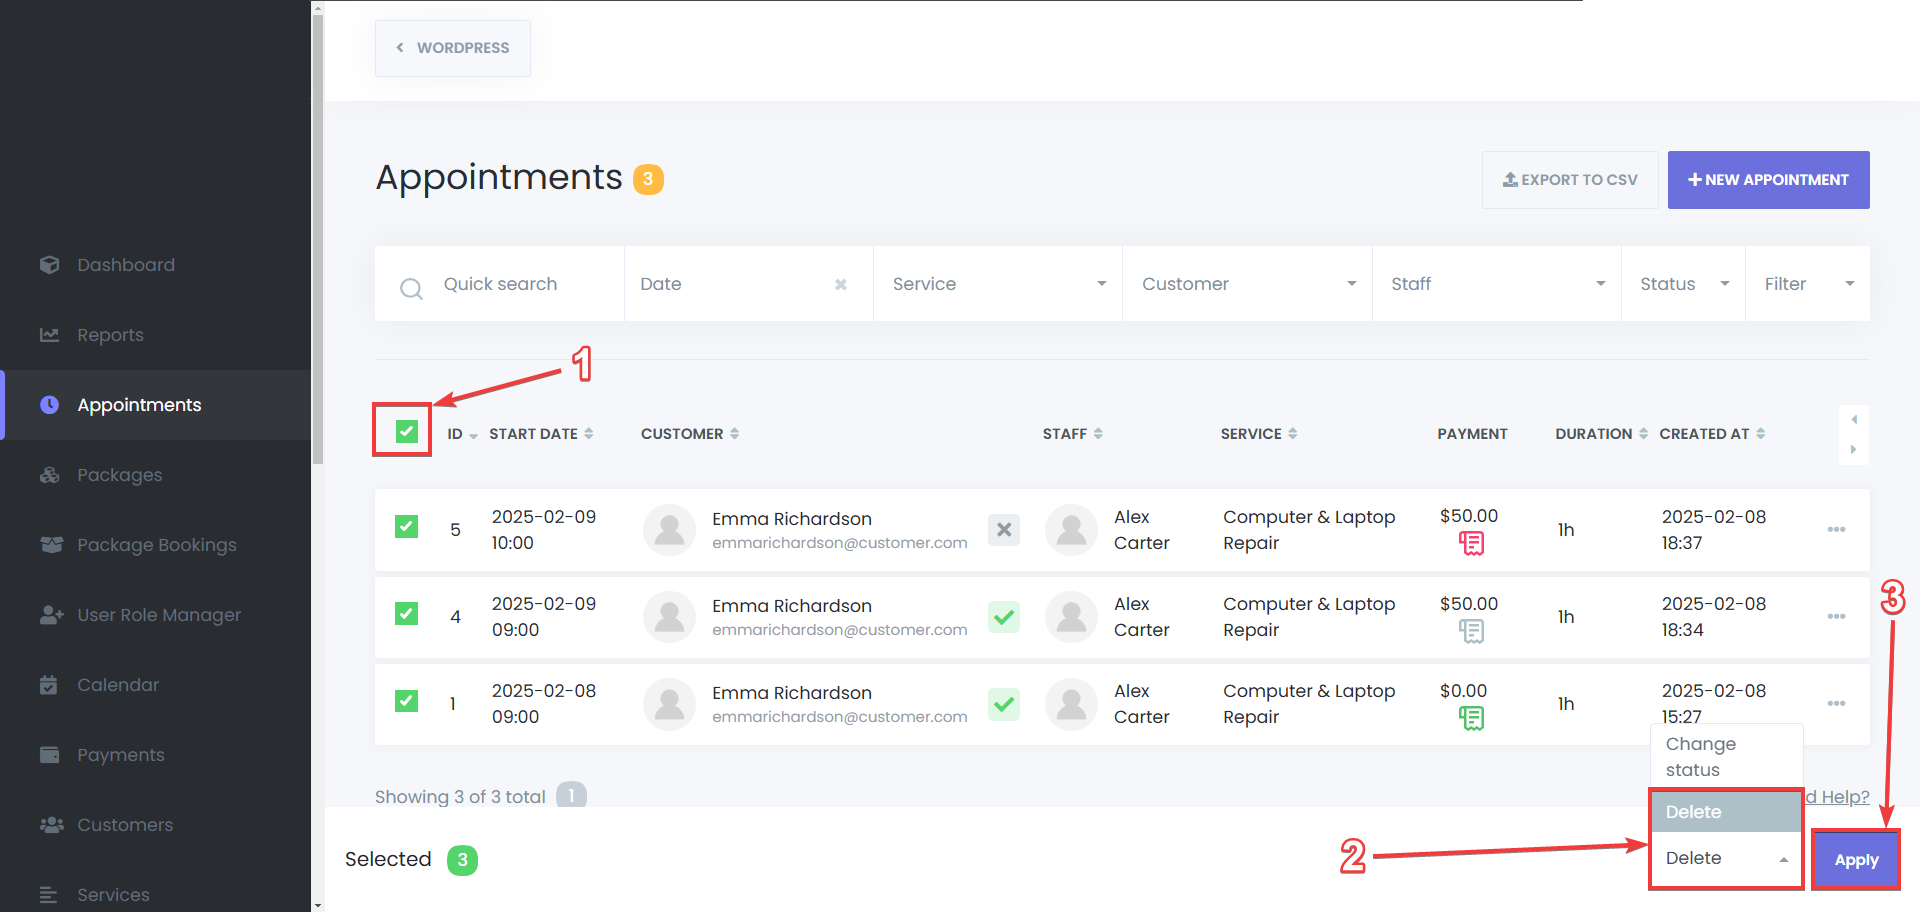
Bulk Deletion – Select multiple appointments and click the Delete button.
Viewing Payment Information #
- Locate the Payment column in the Appointments Menu.
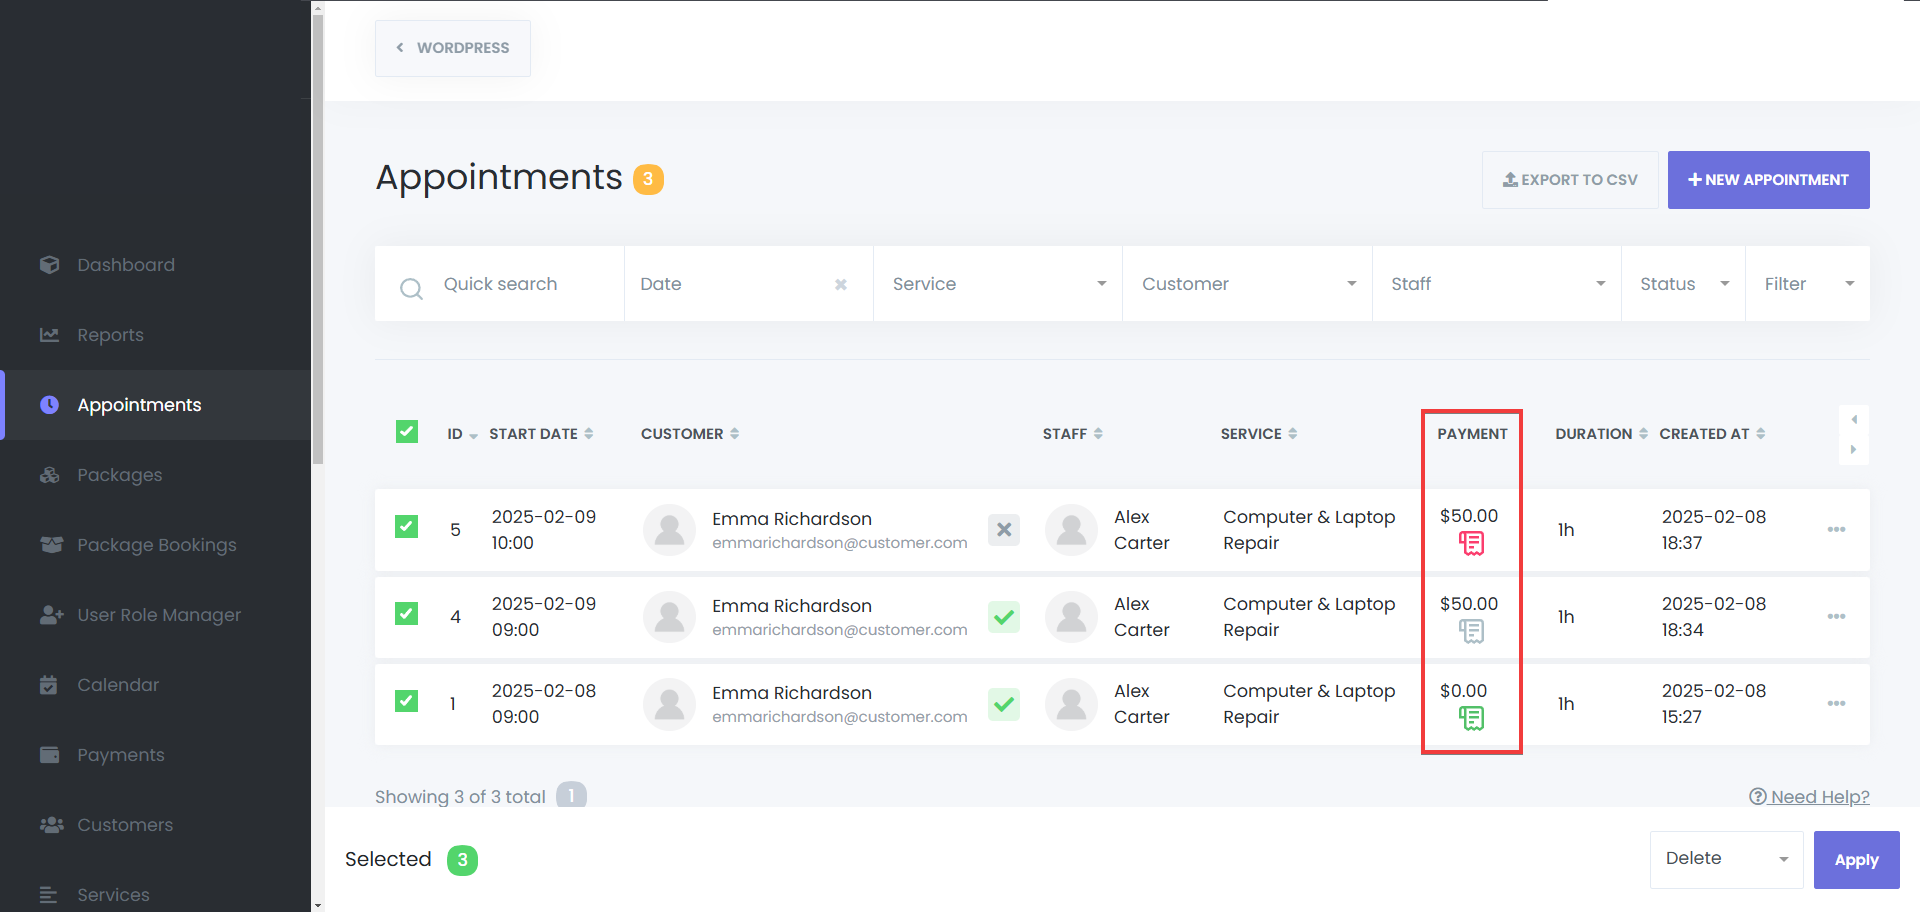
Click the Payment Details icon to view or update transaction information.

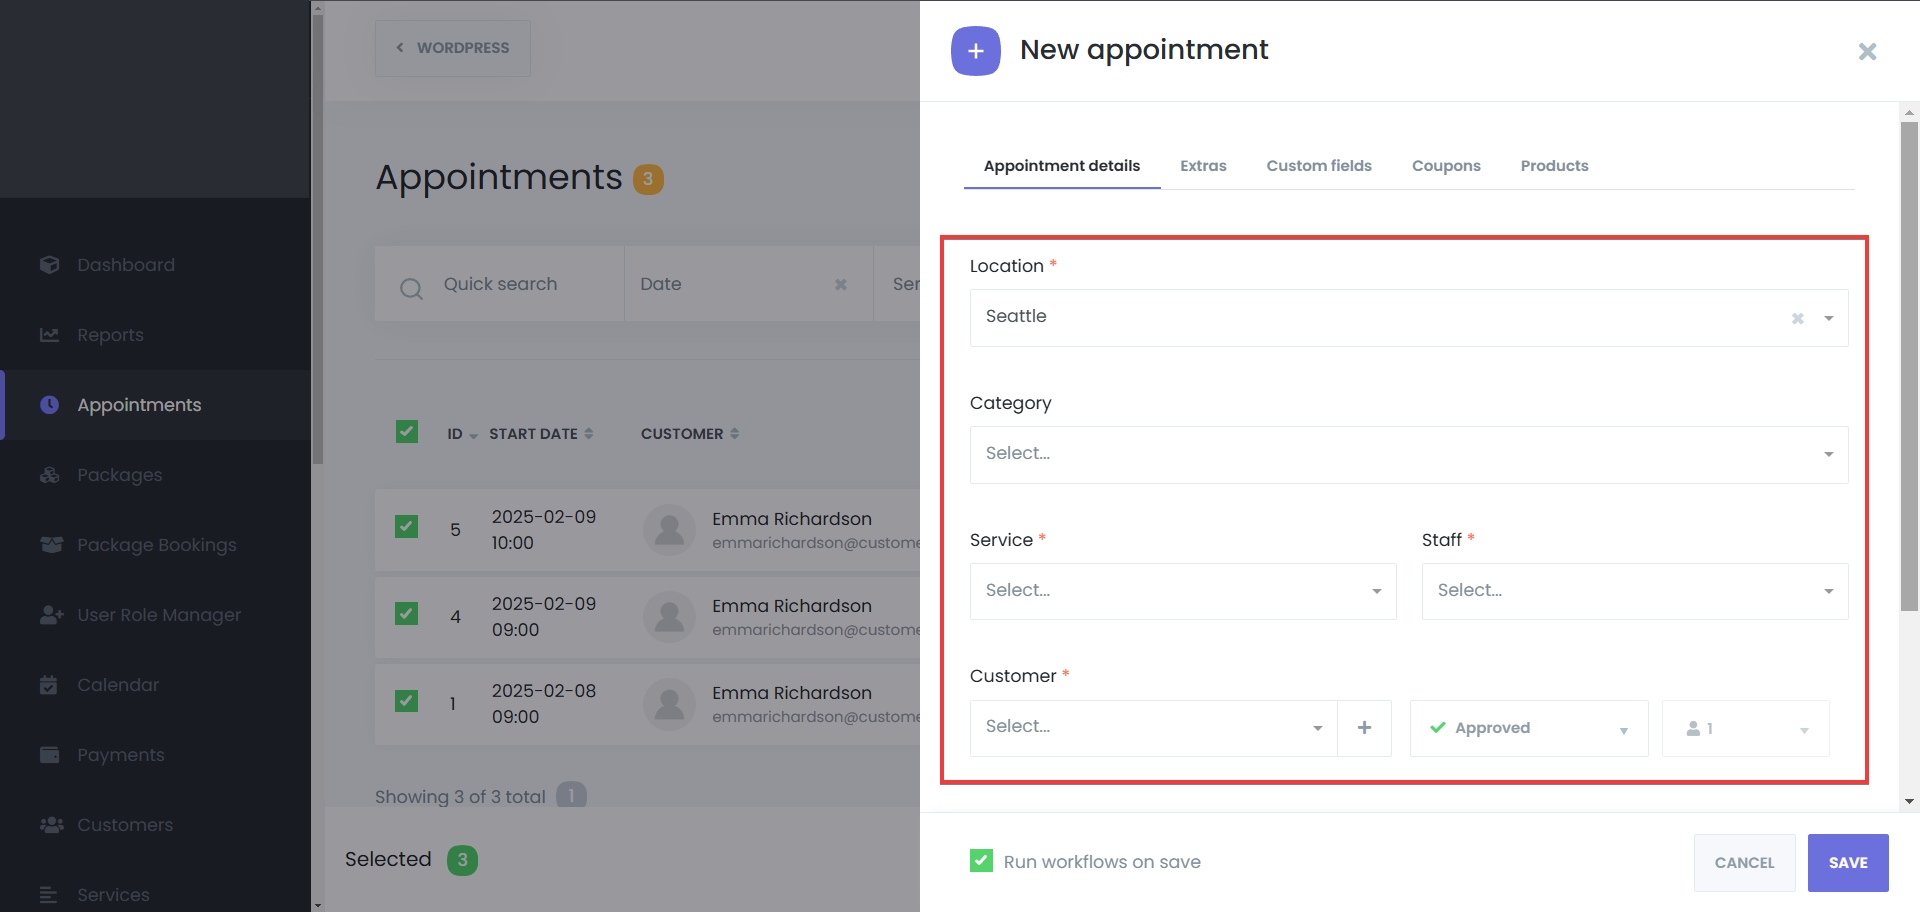
Creating a New Appointment #
- Click “New Appointment” in the Appointments Menu.
- Enter Booking Details In The Appointment Details tab:
- Category – Select the category which contains the needed service.
- Service – Select the service being booked. It can be a recurring service, or a regular service, both of the service types are bookable through the appointments menu.
- Staff Member – Assign a staff member. The options for this section will be available based on the service that you’ve selected.
- Date and Time – Pick an available slot. If you’ve chosen the recurring service, set up the recurring times to save the appointment.
- Customer Information – Choose an existing customer or add a new one.
- Appointment Status – Choose a status for the appointment, including custom statuses* (info: you can add an appointment as approved directly from the booking panel, even if it is a paid service and the customer hasn’t paid for that through the booking panel).
- Appointment Notes – Leave notes for that specific appointment.
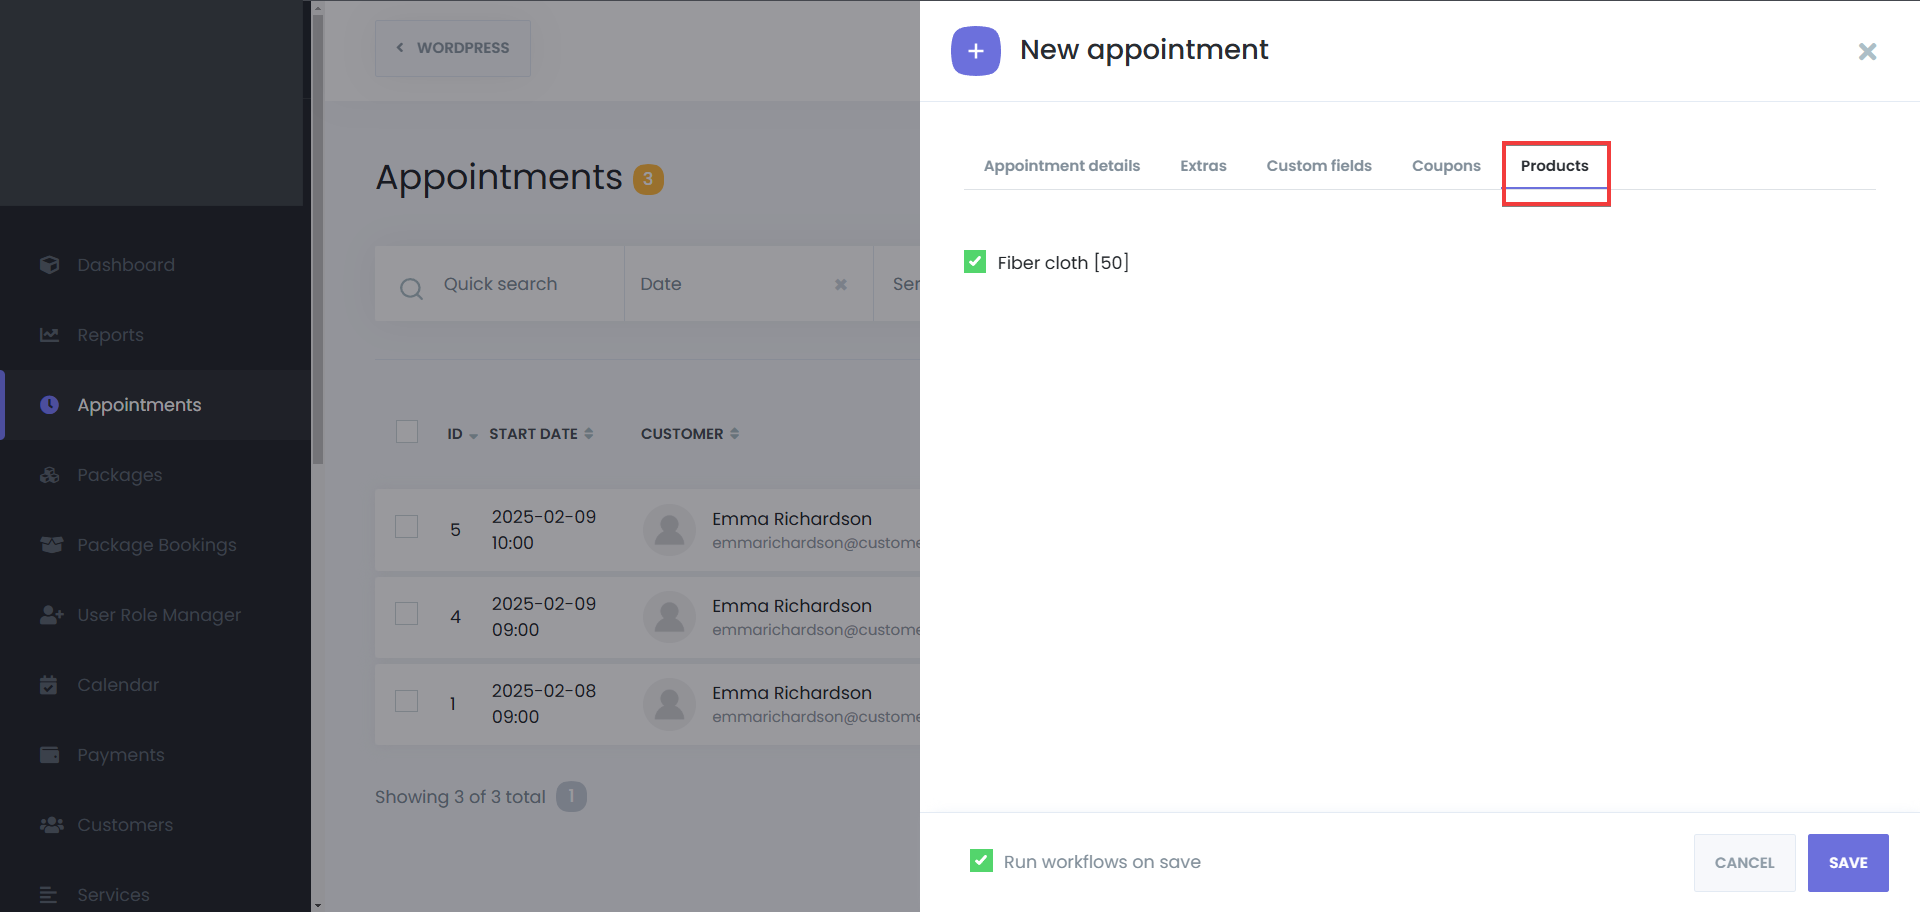
Additional Options:
Extras – Include additional services if applicable.

Custom Forms* – Fill out required fields.

Coupons* – Apply discount codes.

Products* – Add your used/planned products to this appointment.
Enable Notifications:
Activate Run workflows on save to send booking confirmations.

Save Appointment: Click Save to finalize the booking.


